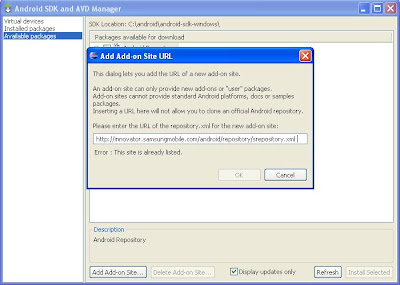
1. Open the Android AVD and SDK Manager
2. Select Available Packages in the left panel of AVD Manager.
http://innovator.samsungmobile.com/android/repository/srepository.xml
4. Check Samsung GALAXY Tab Add-on packages and click install button.
5. Check Samsung GALAXY Tab Add-on license & Click install button.
6) After downloading and installation of GALAXY Tab Add-on, you should restart ADB (Android Debug Bridge) or Eclipse.
The important specs of this device, from an Emulator perspective, are:
- Target platform: Android 2.2, Galaxy Tab
- Screen Info: High Density, despite the fact that it’s not, this is what it reports, WSVGA (1024×600)
- No keyboard
- Has dual cameras
- Within Eclipse, launch the Android SDK and AVD Manager
- Select “Virtual Devices” from the left-hand options
- Click the “New” button to create a new AVD configuration
- Name the AVD: “GalaxyTab”
- Select the Target: “GALAXY Tab Addon (Samsung Electronics Co., Ltd.) – API Level 8”
- Input the SD Card Size: “2048 MiB” (or a suitable value for your uses)
- Keep the default Skin Details: “Default (GALAXY Tab)”
- Keep the default Hardware Property for Abstracted LCD Density: “240” (despite the real density being 170dpi)
- Also leave the rest of the default hardware properties alone
- Add a Hardware Property for Device ram size: “512”
- Save the AVD
And output is as shown below:


